![]()
![]()
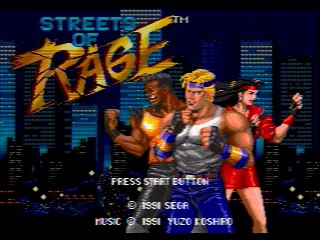
Released in August 1991 for the Mega Drive, Streets of Rage is the first installment in a series of side-scrolling beat 'em ups. Three playable characters (Adam Hunter, Axel Stone and Blaze Fielding) for whom beating up people senseless is its own reward have to fight their way through screens filled with sentient punching bags.
Best time as Blaze on Normal difficulty: Single-segment 0:29:46 by 'galedog' on 2013-10-03.
Get Flash to see this player.
Author's comments:
Streets of Rage Speed run using Blaze (normal difficulty)
I'll start off with a bit of general information to make some sense of the game.
Character stats/info:
*Blaze*
punch/kick = 1 HP
combo finish = 2 HP
grapple knee = 2 HP
grapple finish = 0 HP on basic enemies, 3 HP on bosses (strange)
jump attack = 2 HP
throw = 4 HP
suplex = 5 HP
back attack = 2 HP
walk speed = A (slightly faster than screen scroll)
range = A
*Axel*
punch = 1 HP
combo finish = 2 HP
grapple knee = 2 HP
grapple finish = 3 HP
jump attack = 3 HP
throw = 4 HP
suplex = 5 HP
back attack = 3 HP
walk speed = B (same speed as screen scroll)
range = C
*Adam*
punch = 1 HP
combo finish = 2 HP
grapple knee = 2 HP
grapple finish = 3 HP
jump attack = 3 HP
throw = 4 HP
suplex = 5 HP
back attack = 3 HP
walk speed = C (MUCH slower than screen scroll)
range = B
Basic enemy info:
There are 5 basic enemies and 6 bosses. All have varying health depending on their colors. Following stats are for Normal mode basic enemies in their lowest level incarnations.
*basic enemies*
Garcia(blue) = 5 HP (A garcia wielding a weapon has +2 HP)
Signal(yellow) = 5 HP
Hayuko(grey) = 5 HP
Nora(red) = 8 HP
Jack(red) = 10 HP
Infinite Combo:
Throughout the game you will see me endlessly using this trick. If you take a short pause between punches it resets your combo so you never knock enemies down. You can also press left/right rapidly to catch enemies from both sides. It should be noted that the third punch/kick doesn't push the enemy very far/seems to keep them in place, so sometimes I use it to keep them from going offscreen etc.
That should cover the basic info needed to understand the run.
========
Round 1:
========
Self-explanatory round. Kill enemies as fast as possible and keep moving. You'll notice I do a 1 punch + 2 grapple knees(5 HP) combo instead of a normal 3 punch + combo finish(5 HP) as blaze's combo finish is a backwards somersault kick that is very slow. After I kill the first Hayuko, I stand still for a second to trigger the AI of all those Garcias to come at me at once. The next section has very random AI and actually causes a significant amount of resets. It was pretty chaotic here with that Hayuko doing the flying kick but I only lost about 1-2 seconds. On the next screen I jump kick repeatedly to get the screen all the way to the end, wait for a Nora on the left to spawn and wipe out the entire screen with a special. Afterwards 1 last Nora spawns before the boss(with axel the enemies I jump kick would be dead and this Nora would spawn earlier and get killed by the special, saving a few seconds).
*Boss: Antonio*
Antonio has 24 HP and is easily defeated with the infinite grapple trick(2 knees, left, right, 2 knees, etc.)
========
Round 2:
========
After killing the first Garcia, I move down just a few pixels so that I break the trash cans and hit the signals at the same time to keep the entire screen open. After killing all the Garcias I grab the knife to get some quick kills for the next few sections. I intentionally do a full grapple + suplex combo on the remaining knife Garcias to set up enemy placement/AI and so that I can grab their knives if I accidentally throw mine(if you press B too early, you will throw the knife, you have to wait a second after an enemy spawns in front of you for it to work properly). Jacks are the bane of Blaze's existence. You'd think that her superior range would make her the best character against them but her slow punching often leaves her vulnerable to getting knocked down when they decide to charge quickly. Sometimes the axes will block the first punch from connecting, so you might see me doing some extra punches just to be safe sometimes.
*Boss: Souther*
Souther has 32 HP. The standard left-right infinite grapple trick is possible with Souther, but seems to be nearly frame perfect so I don't bother taking the risk. Instead I use a vaulting trick. After the knee attacks, vault behind him and hold right, you'll grab him from the front again. The vaulting also gives you a few seconds of invincibility, which, when timed correctly, will make the wandering Garcia walk away from you. (I learned this strat from Greenalink's youtube speedrun)
========
Round 3:
========
Possibly my favorite round, if not round 4. Both very easy. Here is the first time you see level 2 Garcias(green), which have 8 HP (+3 over their blue cousins). I let the Hayuko jump over me to avoid picking up the bat(automatic reset). You'll notice the third Garcia actually has 10 HP because he is supposed to spawn with a knife(giving him +2) but it randomly fails to occur sometimes. The next section can get a bit random but it went well here. Succeeding to throw the knife at the Signal saves a few seconds. The next section I intentionally kill some time vaulting and suplexing to keep myself invincible until a Signal spawns from the left before I use a special to clear the screen. If I use the special before said Signal spawns, it will make the spawn times of the following Garcias very slow. So it's actually faster to wait a sec before using the special. I found through random trial and error that staying at the bottom on the next section configures the AI of the Garcias and Noras to be in a perfect spot to get infinite combo'd to death.
*Boss: Abadede*
Abadede has 32 HP. Abadede is unique in that the infinite grapple trick works by merely pressing the opposite direction after the knee attacks so you grab him again facing the other way. Some throws for invincibility take care of the Garcia.
========
Round 4:
========
Easiest round in the game. 3 intentional deaths here. I start out jump kicking until the screen is finished scrolling, wait for the black Nora to spawn and clear the screen with a special. On the next screen I fall in the pit to gain another special. Fall in the pit again, using a special just before I die to gain another. Finish the remaining enemies, move to the next section with Signals/Hayukos, and do the same. On the next screen I move right until a specific Garcia spawns from the right before using my last special. This sets up the pre-boss enemies spawn times.
*Boss: Bongo*
Bongo has 30 HP. The standard grapple repeat works great on Bongo but Garcia is in charge mode immediately. I vault as Garcia approaches and then infinite combo both enemies.
========
Round 5:
========
Hardest round in the game. Easily causes the most resets. Not much to say about the first section. Kill enemies as quickly as possible and move forward. On the second section I move on a specific line to get between the item boxes and grab a Garcia so I can throw him and keep moving to spawn the rest and use my special. The last Garcia on this screen has that annoying passive/aggressive chaotic AI so I stay to the left for a sec so he won't hide off screen. For some strange reason, the following Noras aren't hit by the suplex I use on the first. I found this strategy randomly. Clear enemies, move on. On the next screen I throw Garcia for a glimpse of invincibility before infinite comboing the remaining enemies. The sub-boss Abedede here is easily dealt with via infinite grapple. The next screen has a pretty specific strategy. I start at the top of the screen and after I see the ladder in the background I begin moving diagonally right+down while jump kicking. For whatever reason this seems to prevent the Hayukos from hitting me. Grab the special and clear the screen. On the next section I walk on a specific line to grab the first Garcia and chuck him behind me, also doing this to the remaining enemies until I reach the last Signal, then infinite combo everyone. I grab the knife from the final Garcia to get a couple quick kills on the next two enemies. The Jack right before the boss has extremely chaotic AI and causes a lot of resets. My only strategy is to walk forward while slowly pressing B and about 80% of the time he'll walk into it and I can begin an infinite combo.
*Boss: Onihime & Yasha*
32 HP each(I think). It took a long time to come up with this strategy. First I stand just left of the slope in the background on the ship. This causes Onihime to walk left a bit before her flying kick(important for the end of the fight). I move behind her and throw a few punches so I can grab her front side. Timing a knee causes you to grab Yasha at the same time so you can suplex them both(first seen in Greenalink's run I think). Afterwards I trigger Yasha jumping over me so I can move left and grab Onihime again. After a couple knees, I vault over her and wait for Yasha to attempt grabbing me which triggers Onihime to face me again, allowing me to grab her from the front. Repeat until I throw her and kill her. If the placing is right, I can now grab Yasha and do the infinite vaulting grapple attack that I used on the round 2 boss.
========
Round 6:
========
Easy round. Horrible boss. I actually messed up the first section but it didn't really cost more than 2-3 seconds. Looks stupid but still worked out alright. Normally I stand very close to the right screen edge and spam punches keeping everyone trapped offscreen. The next section also looks terrible but I didn't lose a single second. When the Signal threw me, I intentionally didn't recover as to avoid getting infa-stabbed by the knife. Wait for the last Signal to spawn and clear the screen with a special. Sub-boss bongo easily dealt with. Jump kicking seems to be the only decent way to keep those Noras grouped together. I did make yet another mistake by letting that Jack hide behind the press machine but I only lost about 3-5 seconds there.
*Boss: Double Souther*
32 HP each(I think). This boss seems to be easier with Axel, especially since his grapple finish isn't a useless pile of crap like Blaze's. Basically you want to keep throwing/knocking each boss off screen repeatedly to cause them to cycle around at the top and bottom of the screen. It didn't go perfectly here but I didn't really lose any time. The basic strategy worked.
========
Round 7:
========
If this were a TAS or something I assume the fastest strategy would be chucking enemies over the edge but it's not very realistic and leaves you very vulnerable for the most part. So I try to trap enemies on the left off screen and infinite combo as much as possible. Specials seem to be a very bad idea as well since the first wave of enemies is always small and spawns happen gradually. Plus the screen has to travel very far as you go higher and higher up the building. It went okay. Nothing close to warranting a reset so I'm happy.
========
Round 8:
========
Everything should be pretty self-explanatory at this point. Clear the screen, use the noted boss tricks, move on. I have the enemy and cart positions memorized. Don't know what to say other than that. I did get suplexed by Yasha near the end which was pretty inevitable given my decision right before she did. It sucked but I moved on. As far as I know infinite comboing the pre-boss Garcias is the fastest way to kill them(I use a third punch to keep them close enough to remain trapped).
*Final Boss: Mr. X*
As safe as this strategy looks, it's not 100% fail-proof. Essentially, I want to keep him on screen and monitor his behavior. I start out with a throw, throw a Garcia into him and kick him as he stands. If he cycles to my side of the screen I throw him again, and repeat. Variables are pretty likely to happen. Garcias can have horrible timing so you can't jump kick or throw them before Mr. X reaches you. So you end up grabbing Mr. X and Garcia shows up just in time to punch you before you have time to do anything which ultimately results in Mr. X hitting you. It usually won't happen more than once or twice so this strategy is still pretty decent(assuming you don't enter the final boss room with very low health).
That sums it up. If you're still reading, thanks for watching/taking interest in this run. Also thanks to Nate for helping with encoding, and thanks to everyone who plays this game and has discovered strategies and tricks over the years.