![]()
![]()
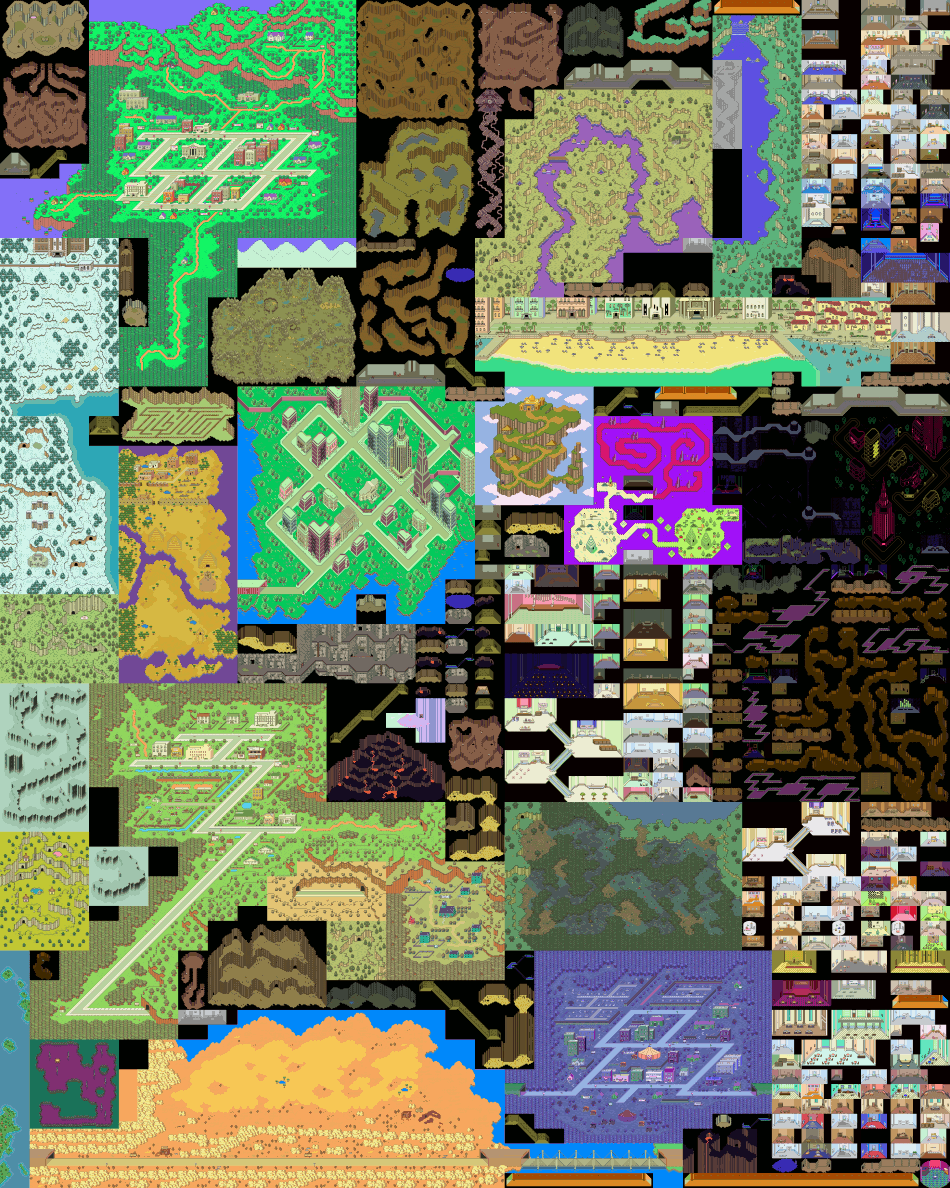
Though it was immensely popular after its 1994 release in Japan, EarthBound's 1995 release in North America only managed to produce a small (if curiously devoted) cult following. For the most part, the gameplay followed the traditional RPG formula, but it differentiated itself from other games of the time with its lack of an overworld map and its semi-infamous "rolling" hit point counters. It also featured a unique style that fell somewhere between a bizarre parody of American culture and an all-out drug trip, as well as one of the best and most varied soundtracks on the Super Nintendo.
Return to the Game List, the FAQ, or the Home Page.
Single-segment: 3:56:27 by Andrew Woolston.
Get Flash to see this player.
Author's comments:
This is a single segment speedrun of Earthbound without using glitches anywhere in the game and essentially, playing the game essentially "as the developers intended". Use of the item duplication glitch, clipping through cliffs, clipping out of bounds, debug menu, etc., are not allowed. After years of playing this game and trying to get a run I was truly happy with, this is easily the best run I have ever performed.
Special thanks to the following people that helped this run happen in various ways (in no particular order):
__sdfg
pop_em
nemi43
Falexxx1
RedBalloonMan
lltemple
0xwas
Aurilliux
The biggest change in this run from previous iterations is a heavier use of RNG manipulation throughout Onett, which essentially removed the last grinding section from the run. This means that we can attempt to skip all random battles with very little worry about experience as we get plenty from the bosses and scripted fights throughout the run. This manipulation alone saves about seven to eight minutes against an average non-manipulated Onett. Beyond that, this run contained excellent execution and above average luck throughout the entire run.
With that said, here are my thoughts on all the individual sections throughout the run. Enjoy!
Onett
This is perhaps the biggest change in the route from previous runs. RNG manipulation has been a prominent part of Earthbound speedrunning for several years, but never had anyone attempted to maintain RNG for more than about seven or eight minutes at a time in any category. New developments and new discoveries (shoutout to __sdfg for discovering a new RNG memory value previously unknown that influences randomness based on character movement and creating some of the RNG route in Onett) have lead to a better understanding of how the game determines randomness. This development allows me to manipulate all battles, item drops, enemy spawns, NPC movements, etc. to have a TAS-like Onett. The best part of manipulating this section is that it eliminates the only grinding secting in the entire game, Giant Step, where I would level up to 8 before Titanic Ant. Instead of this grinding, I manipulate two bomb drops (1/128 chance drops) and use those to kill Titanic Ant. The manipulation continues until I enter Twoson where I promptly lose it. RNG manipulation is never used again in the run since this is a single segment run and further manipulation would require a console reset.
Twoson & Happy Happy Village
Spawns on the return trip from the pencil were a little rough, but the first and second approach spawns definitely made up for that. The walk to Happy Happy Village was also phenomenal with very few enemies and even fewer necessary despawns. Happy Happy Village is a little risky here since I'm doing so with only the Holmes hat purchased in the town as armor, but everything worked out in my favor.
Threed & Winters
First trip into the graveyard was unfortunate with a fly that managed to sneak in after I talked to the zombies, but I got lucky and had one of my rear party members initiate the fight as a surprise attack so it wasn't much of a loss. I didn't get either the duck skip or protoplasm enemy skips thanks to bubble monkey in both instances (the former is extremely rare) but the fights themselves were all just fine. I occasionally stutter very slowly through areas in Rainy Circle cave. This has the dual-purpose of seeing enemies as soon as they spawn so I don't have to walk as far back to despawn them and also sometimes enemies will despawn themselves when you are stuttering after the game has loaded them.
Boogey Tent & the Threed Cave
Boogey Tent went down quickly without a problem. The Threed cave that happened in this run was absolutely phenomenal. I only got into one unscripted fight which was a surprise attack. This is a frequent death spot in my runs and getting through there with only that one fight was near perfect.
Belch's Base
Another area that went extremely well. The area at the bottom of the ladder frequently spawns foppies that, while not a threat, are a time sink to kill, so not having that fight was great. The rest of the base was extremely smooth with no problems.
Dusty Dunes Desert and the Mole Cave
I used freeze alpha instead of beta to save psychic points on these first moles. This has the risk of potentially not killing the mole if the bottle rocket damage is rolled low, but I feel the risk is worth it since it saves Paula's psychic points for potential random battles which came into play this run. At the fourth mole, I got pinned in between some Noose Men where I was able to kill them easily because of the PP that I had saved. I also had an excellent surprise attack on an ant following the fight. I had to time my movement perfectly so that I would be on its other side when the flashing stopped. Overall, an above average mole cave and desert.
Fourside & Moonside
The Department Store which is arguably the riskiest part of the run went very smoothly. I got the best encounter at the top of the escalators and was able to kill the Spook in a single round. Moonside also went very well with only the single encounter in the cafe and a quick Mani Mani fight despite getting paralyzed. I was able to skip all the Sentry robots in the Monotoli building which requires some pretty precise movement and then kill the Clumsy robot in a quick two rounds.
Rainy Circle and Summers
Shrooom! cooperated nicely by hitting the Teddy bear with the mushroom attack which allowed for the fight to be a bit quicker. The Kraken fight could have been a bit quicker with some higher damage rolls resulting in a one round fight, but I will gladly take any Kraken fight that does not involve it breathing fire (which has a strong chance of wiping the entire party).
Scaraba & Pyramid
This has the only part of the run where I just failed to execute properly. I accidentally teleported back to Onett going down to the Pyramid avoiding enemies. Thankfully the return teleport spot is right in Scaraba so it was a very minimal time loss. No major problems in the Pyramid. I missed some of the hieroglyph skips on the return trip from the button, but granted those are extremely precise skips so I don't feel badly about missing them. Both trips through Dungeon man and the trip through the southern Scaraba desert went extremely well. The desert is a frequent death point so getting through there quickly with no fights is perfect.
Deep Darkness
No real problems here. Lots of enemies and I had some close calls with some of the teleports, but I got into no encounters and didn't really have any problems with the actual teleports themselves.
Stonehenge Base
I wait for a few seconds at the beginning of the cave for an enemy off screen that has a 100% spawn rate to despawn himself before moving. The spawns through the rest of the cave were quite good and I managed to force quite a few surprise attacks by taking advantage of the odd hitbox of the starmen.
Lumine Hall
This dungeon was easily the best I have ever had it be. I fought no fobbies in the first section. I had no fights and only two despawns in the basement (which usually has at least one or two fights and many more despawns) and only one fight in the last area with one surprise attack. Potentially the best individual section of the entire run.
Magnet Hill
No fights and only a couple despawns. Ideally you'd get zero spawns in the water since you move so slowly and its drudgery to slosh back and forth to despawn enemies, but still very smooth overall.
Pink Cloud
Very average Pink Cloud. I got some first round runs, but missed others so it balanced out.
Fire Spring
I stand motionless at the bottom of the first rope to let an enemy that has a very high spawn rate move to the right and despawn itself. Both caves that have nasty spawn rates and can waste lots of time cooperated quickly by giving me empty rooms which I was very happy about. I then managed to get a surprise attack on a very nasty encounter in the last cave which can wipe me you quickly if it goes poorly. All the other fights that occurred are pretty much expected and went without a hitch. I would have liked a couple more surprise attacks but I can't complain about this cave. Carbon Dog and Diamond Dog went very well and I was actually able to finish the entire fight in only three rounds which I had never done before.
Lilliput Steps
Just backtracking here to finish a dungeon previously. It's pretty basic since you're so overleveled. All the enemies run from you and the fastest way to kill the boss is just using auto attack.
Milky Well
The fact that I didn't get into my first fight until halfway through the dungeon is fantastic. All the enemies have either a 50% or 75% chance to run from you, so in big groups of enemies, one of them is bound to be coming at me. Getting very few spawns and only two fights was great.
Magicant
A couple unfortunate spawns early on in the colored area, but it quickly turned really amazing. I managed to dodge some packs of enemies by anticipating their circular movement and walking quickly with the skip sandwiches. I skip the bat here which is undeniably incredibly risky. Ness still has the Sand Lot Bat from Happy Happy Village 3 hours prior so if I get into a kraken fight in the Sea of Eden, I'm in for a world of hurt since they are unrunnable fights and Ness will be doing virtually no damage to them with normal attacks. Fortunately, I was able to skip all three krakens very quickly. The first and third were cut very close but worked out. The Ness's Nigthmare fight could not have gone any better. It never did an actual attack, and all three Bags of Dragonite got high rolls resulting in a three round kill. Easily the best Sea of Eden and Ness's Nightmare fight I've ever had.
Dark Onett
The key here is just skipping as many fights as possible by abusing the teleport mechanic and moving around enemies quickly without initiating any fights. I had an incredibly tight squeeze at the first bend which I was very happy about. Getting into zero fights is about as good as I could have asked for.
Cave of the Past
The walk up to Giygas was a bit rough. Lots of fights I was hoping would have been surprise attacks and lots of failed runs against the ghosts of starmen (which always use starstorm alpha first round). During my preparation for the Giygas fight in the final area, I realized that Ness did not have the third healing which can revive party members. I switched over a cup of lifenoodles from Poo onto Ness as a safety in case the fight went poorly. Fortunately, the Giygas fight went quite. Giygas used Rockin alpha instead of beta and I was able to finish the fight in two rounds. Phase two of Giygas went alright. I would have hoped Poo had stayed alive so I could have used another starstorm but I got some high damage rolls from Ness's Rockins which helped to balance it out. Phase 3 of Giygas is essentially a formality at this point. Paula has the Franklin Badge and the Sea Pendant so she is essentially invincible to Giygas' attacks.
Single-segment with resets and large-skip glitches: 1:25:31 by 'nemi'.
Get Flash to see this player.
Author's comments:
This is a speed run of EarthBound using the stairs glitch. The stairs glitch causes your party to enter a "ghosted" state in which your party is able to walk through almost all solid objects, including walls, NPCs, trees, cliffs, etc. This allows for major skips and sequence breaks because every location in this game is laid out on a single large map. Normally, the party is unable to walk directly between adjacent locations because each area is surrounded by an impassible boundary of some kind, but entering a ghosted state allows the party to walk unimpeded by these boundaries.
I first got interested in this category after watching Mickey Mage's AGDQ 2012 run. Before watching his run, I had no idea EarthBound was so broken for speed running. The route I use is based on one devised by the Japanese runner ピロ彦 (Pirohiko), as shown in his 1:48:52 run (Nico timing) on the Japanese version. I also made use of a Lua script written by Pirohiko to devise the luck manipulation methods I used in this run.
Overall, this run has pretty good luck but has more menu navigation errors than I'd like. The amount of time saved due to luck more than makes up for the time lost from silly menu mistakes, however, and the run is definitely faster than what I can get on average.
4:58 - During nighttime Onett, I used luck manipulation to avoid unnecessary fights and ensure a 4-round Starman Jr. fight. Opening and closing the main menu and talking to no one for seemingly no reason were done to adjust the RNG.
12:59 - Frank fight: I accidentally selected "auto-fight" at the start...and I was lucky to get away with it. Frank can 2-hit KO Ness with his knife attack, so recovering after each hit is the safest strategy. The fight against Frank was about average, but I got a lucky SMAAAASH!! hit against Frankystein.
16:02 - First Sanctuary cave: This is the only part of the run were grinding is needed. The Titanic Ant is accompanied by 2 Black Antoids that use only Lifeup, so Ness should learn PSI Rockin α at level 8 before that fight.
In terms of time, this is also probably the most luck-dependent part of the run. Fighting Attack Slugs is the most efficient way of earning experience points, but they aren't the most common enemy in the cave. A couple of minutes can be gained or lost depending on how often they appear. This run actually had good luck in this regard.
Titanic Ant luck was below average. Ness's second PSI Rockin was blocked by PSI Magnet, and the Titanic Ant used Shield once. It also got a SMAAAASH!! hit, which has only a 5% chance of happening per hit. The risk of death is pretty high in this fight, so I'm just glad Ness survived.
25:52 - Police: There is some risk of death against the police, but it's not as bad as the Titanic Ant. Police luck was about average.
29:38 - I discard everything I can from Ness's inventory and buy 8 Salt Packets and 3 Skip Sandwiches at Burglin Park. The Skip Sandwiches are used to skip Twoson and trigger the stairs glitch in Summers; the Salt Packets are used to exploit the condiments glitch to dupe a Brain Food Lunch later in the run. The condiments glitch can be used with any condiment, but a Brain Food Lunch with a Salt Packet recovers full HP/PP.
30:38 - Twoson skip: the walk-through-cliffs glitch is used to cross the cliffs south of the bus station. Crossing the cliffs leads to a road section that connects Threed and Dusty Dunes Desert.
One of the biggest time losses in this run occurs at the third cliff. I can usually cross this cliff after a few tries, but it ended up taking about 30 seconds in this run.
32:08 - I buy a Cup of Coffee to prepare for the first use of the stairs glitch. Coffee works well because it doesn't recover too few or too many HP and it doesn't consume a Salt Packet.
32:36 - My luck in the graveyard wasn't very good. More enemies appeared than usual, and it took about 30 seconds before I could proceed.
40:10 - With Jeff at level 1, the first Worthless Protoplasm is actually pretty dangerous. I have no use for the Big Bottle Rocket later in the run, so I use it here.
40:36 - It's possible to skip the Mad Duck, but setting up the skip can take more time than the fight itself depending on where the Mad Duck spawns.
41:16 - If I had waited for the Bubble Monkey to catch up to Jeff before walking past the second Worthless Protoplasm, I might've been able to skip this fight.
41:57 - Fourth Sanctuary cave: my luck with enemy spawns was quite bad in the second and third rooms. I spent almost 2 minutes trying to de-spawn enemies.
45:13 - I save and reset the game in Dr. Andonuts's lab to reset the RNG and set up for luck manipulation.
48:21 - Luck manipulation is used to enter a fight with 2 Urban Zombies and leave the fight with Ness at critical health with a cold and Paula and Jeff at 0 HP. Having Ness at 10 HP with a health-draining status effect triggers the critical health warning used to activate the stairs glitch. Having Paula and Jeff at 0 HP makes it possible to set up the stairs glitch later in the run.
After glitching to the museum in Summers, I save the game, reset, and make a copy of the save file. The second file is used as another way to trigger the glitch. Using a second file might seem questionable, but I think it's reasonable as long as the file is made during the course of the run. It's possible to have a file prepared beforehand, but I avoid doing that.
Once the glitch is activated, it's possible to go straight to Giygas, but the game will hang up during the first prayer. This is because each area that appears in the prayers needs to be "prepared" to run the scenes.
This preparation occurs when the party travels back in time with the Phase Distorter. Two events are needed to initiate the Phase Distorter quest:
49:57 - After the second file is made, the first file is loaded and the glitch is triggered again to go to Lumine Hall.
50:55 - While in the Lost Underworld, I get a Brain Food Lunch, a Horn of Life, and a Sea Pendant. The Brain Food Lunch is used with the above-mentioned Salt Packets to maintain Ness and Paula's PP during the Ness's Nightmare and Giygas fights. The Sea Pendant is used to protect from Ness's Nightmare's glorious light attack and Giygas's attacks.
53:00 - The second file is used to activate the glitch. Before leaving the museum, I wait a bit because this makes the RNG less active.
Luck manipulation is used until the end of the first Kraken fight because enemies spawn very frequently otherwise. I also need the experience from the Kraken to let Paula learn PSI Shield Σ after defeating Ness's Nightmare.
57:59 - Luck manipulation ends once Ness levels up because the stats he gains depends on how he levels up throughout the run, which introduces randomness. That means I have little control over how the last 2 Krakens move. My luck with these Krakens was below average, and I lost about 30 seconds before they moved out of the way.
59:24 - My Ness's Nightmare luck was pretty good. I try to put it to sleep before using a Bag of Dragonite just in case Ness's Nightmare uses Shield β.
1:14:08 - My luck against Giygas was the best I've ever had, and I ended up saving a minute over how long this fight usually takes me. Two SMAAAASH!! hits by Ness in the first phase is rare, and Poo managed to stay alive through the second phase. Paula also never fell since Giygas used his electrical shock attack only on the last round.
The only hiccup was Poo feeling strange during the second phase. This rarely happens, and I wasted a round before realizing Ness can use Healing β.
Single-segment with uber-large-skip glitches: 0:09:58 by 'nemi'.
Get Flash to see this player.
Author's comments:
This is a speed run of EarthBound using the "check area" glitch, which can give you access to the debug menu. The debug menu has an option to instantly warp you to certain events, one of which is the epilogue after the credits. Details on the glitch and how to exploit it to access the debug menu can be found at TASVideos (1, 2) and on SDA's Knowledge Base.
For a while, this glitch had been used only in tool-assisted runs, but a Japanese runner named 脳 (Nou) found a way to complete this run on console with the Japanese version of the game. His run can be found on Nico video.
Outline:
The "check area" glitch took a while to open the debug menu. I've seen the glitch open the debug menu after only 3~5 checks, but I never got that lucky in a successful run. If the glitch had behaved more optimally, this run could've been nearly 30 seconds faster.
Additionally, there are a couple of major tricks I excluded from the run: with a technique called "Stutter Walking", it's possible to skip the Starman Jr. fight and Buzz Buzz's final words. When I attempted these skips, however, I found my success rate was very low and ultimately decided against including these skips.