![]()
![]()
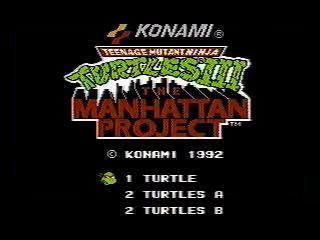
The evil Shredder has attacked once again, and our favorite half-shelled heroes still won't cut him no slack. Released in 1992, Teenage Mutant Ninja Turtles III: The Manhattan Project is the Turtles' last outing on the NES, and other than having special moves (and a much cooler title), it's not much different than the previous TMNT game. TMNT III pits the world's most fearsome fighting team against the massive Foot Clan army on a mission to rescue their home town from the Shredder, though we all know Krang is the real "brains" behind the operation.
Category Note: Characters are only considered separate categories if a run has no deaths. Cruel, I know, but it's the only way to make characters separate categories.
Return to the Game List, the FAQ, or the Home Page.
0:39:36 by Tom Votava.
Get Flash to see this player.
Author's comments:
For the record, since the taping of this run, I have reached Krang without dying on more than one occasion, so I may be able to pull off the zero-death run yet!
Special thanks to stanski for putting up the bounty for the zero-death game and getting me interested. Also thanks to Croc-Doc for his excellent speed run, which was entertaining enough to keep me playing this game at a time when I was about to put it down!
* Scene 1 *
I opened up with a rather unlucky setup of Foot Soldiers. I pressed on anyway, because I like to see if I can make up the time elsewhere.
Come to think of it, this entire level was rather sloppy. Must have been one of my first attempts of the day, I guess.
Rocksteady: Give Konami credit for consistency, putting this chump at the end of the first levels of EVERY NES TMNT game. :)
Timer: 111 (Best: 113)
* Scene 2 *
Nothing special about the surfer scene, though I must say that I HATE those red Foot Soldiers! They always have to play "keep-away" for some reason.
The submarine is MUCH more interesting. Those fireball guns are usually run-killers for me. Not my fastest run through here, but I'll take it.
GroundChuck: If you've seen a TMNT3 speed run, there's nothing new here. This guy's a pushover!
Timer: 152 (Best: 156)
* Scene 3 *
This is usually one of my best levels becuase it's a LOT less random. This is because there are a lot of sets of enemies that appear from only one side of the screen. They are VERY predictable when they do this!
Enjoy the little accident with the bowling balls. :) I simply drilled to close to one of them.
Slash: Here comes death #1...I was just a tiny bit to high on him, which made me vulnerable to damage. Very preventable, just a soft flick of the thumb.
Bebop: Death #2 awaits! I have a super-fast method for beating this guy, which was working just fine until he stopped throwing that ball of his. I got impatient and took a chance in the name of speed...and got burned! :)
Timer: 155 (Best: 159)
* Scene 4 *
It's worth noting that up until now, I was playing for the zero-death run. With that out of the way for the rest of the game, I played MUCH more loose from here on out.
I try not to drill so much in this area because it's so long. I like to have a couple of spare life bars for the parking garage, since there are a bunch of enemies there that are easy to throw.
Dirtbag: Meet my nemesis! No matter what I do, this guy always manages to play cheap against me by hugging the sides of the screen. I lost my rhythm when this happened and eventually slipped with the controller trying to drill. Result: Death #3.
Timer: 130 (Best: 136)
* Scene 5 *
The sewer area is supposed to be a fun level, but still don't like it. Too many times, the split level (due to the water) makes the enemies run away too much!
Mother Mouser: The way I've been going, I half-expected to die here. This is the first boss I didn't die on since Scene 2! This is actually pretty easy, if you keep your rhythm.
The area following Mother Mouser is the tricky part, as I always play it with one life bar. It's simple, but I've screwed it up many times. Fortunately, I have an easy go with it.
Leatherhead: Fast fingers are necessary here. Spend a split second on top of this guy and he'll get you with his spin move. He also is one of the rare bosses in this game that actually gets faster as you damage him. The last blows are always the toughest to land safely.
No deaths for once. Yay! :)
Timer: 136 (Best: 138)
* Scene 6 *
I LOVE this area. Raph has so many fun ways to play through here fast, and you even get a pizza half way through!
My best moment is when the little helicopters come out. Perfect positioning and timing with the drill can knock them all out in one blow!
Rahzar: An unlucky battle to say the least. First he goes into "ice mode" (which I can usually avoid), and then I screw up the timing of one of my drills! For future reference, make sure he comes COMPLETELY off the edge of the screen before you attack. Death #4.
Shredder: Nothing special here, just some mad drilling. Watch out for the jump kicks though, since they sometimes move vertically and take you out!
Timer: 131 (Best: 136)
* Scene 7 *
Not exactly sure why those dudes with the floating platforms give me trouble. They just do. I had fun getting knocked off the platform by that last enemy though. :)
I used to hate the rooftop area before I started speed-running this game. Too darn many "rows" of enemies. Constantly drilling with Raph changed all that for me.
Tokka: Finally, a cake walk! I have to be having a REAL bad day to die here.
Timer: 138 (Best!)
* Scene 8 *
Final level! I have 5 lives remaining, but I've Game Over'ed with more than that in the past. Here goes...
Death #5 was a bit annoying. How unlucky do you have to be to get egg'ed in the head? Only good news here is that I got a fresh lifebar out of the deal.
Mother Mouser II: I've sometimes been able to get in some easy blows before he starts spitting out Mousers, but no luck here. Instead, I had to get him away from the electric wall and fight him like last time.
The second half of this level was my moment to shine. This was the fastest I've ever done this area by far! Take away a couple of brain farts (like attempting to jump-kick a foot soldier this late in the game) and I'd call it perfect.
Death #6 was intentional. With nothing left but Krang and Shredder, there's no more need for the drill move. Time to bring out the ultimate boss-killer, Mike! His special move, the Kangaroo Kick, is twice as powerful as Raph's drill, plus it has a tendency to hit bosses twice in one move!
Krang: I took a few hits, but that's okay thanks to Mike's fresh life bar. It's rather easy to go all-out here. I just wish I wouldn't have panicked at the end, where those missiles were going flying right by me...until I moved. Death #7. :(
Super Shredder: With too many lives gone to care, I just started spamming the Kangaroo Kick for all it was worth. I expected to die from being too aggressive here, but I got lucky for once. :)
Well, that's it for this episode of TMNT. Tune in next time when Shredder somehow un-mutates himself and then throws the Turtles into a time warp. (nice one, Konami) :)
Enjoy!
Tom V.
Michaelangelo 0:43:46 by Tom Votava.
Get Flash to see this player.
Author's comments:
This run represents me coming full-circle: I started out with attempting the zero-death challenge bounty, but gave it up to try a flat-out speed run, which was far more doable. I then went on vacation and came back ready to try again. The combined experience turned out to be a good thing for me, as I don't think I would have done this nearly as fast without doing the speed run first!
This run has an interesting twist, in that I used Mike as my character instead of Raph. Raph's Drill move easily makes him the fastest overall turtle, but his one glaring weakness is against bosses. The Drill does very little damage, so you have to hit everyone many times. Granted, he's fast enough to avoid a lot of problems, but over an full 40+ minute game, a lot can go wrong. All it takes is one slip of the controller at the wrong moment!
That's where Mike comes in. Mike is not nearly as fast as Raph, but his Kangaroo Kick move is so powerful against bosses that he can give Raph a decent race. One hit from the Kangaroo Kick ("Kick" with a capital K, for short), not only does more damage than Raph's Drill, but it's arc makes it capable of scoring multiple hits in one blow!
Mike's Kick gives you the ammo needed to make this run possible. With enough practice, you can get through the stages without dying easily enough. It all comes down to the bosses. Mike can taken out most of them with some rather simple patterns. The only bosses in the game that give him any kind of trouble are Shredder, Krang, and Super Shredder. Go figure that they're all so late in the game! Believe me, you can spend a LOT of time cruising through this game only to fail against these guys. It's so frustrating that I was about ready to give up!
Since this is primarily a zero-death run, I made a call to only really use the Kick against bosses. Sure, there are a few places that you'll see it, but those are only in places where I'm confident enough in my ability to do with a little extra life power for a given stage.
Oddly enough, this doesn't really hurt my speed very much. Mike's Kick may be powerful, but it's also VERY slow. Unless you're able to take out 2 or 3 enemies at once, it's actually faster just to use throws. How convenient! :)
Okay enough of my rambling. On with the run!
* Scene 1 *
Beach:
Take my Raph speed run, remove a few Drills, and you get this. Nothing spectacular, but it gets the job done.
Rocksteady:
Still a chump, only now he's even easier. 6 hits is all it takes!
Time: 110 Best: 113
* Scene 2 *
Surfing:
Again, almost a carbon copy of my Raph run. Only difference is that Mike can one-shot the helicopters at the end. I still HATE those red guys though!
Submarine:
This is waaaay easier when you're not using Drills! The cannons are still annoying, but with a high life meter, they're nothing to worry about.
GroundChuck:
Another chump. Most of your Kicks will hit twice even!
I used to die here with a low life meter if I was too aggressive. Let's just say that Kicking GroundChuck while he's charging is usually a bad idea!
Time: 153 Best: 156
* Scene 3 *
Bridge BS ["Before Slash", that is]:
I still love this level. This is one of the few scenes where I can match my fastest Raph time! Mike can do everything that Raph can, plus he can kill Bebop a lot faster. The best part is that I can go all-out here, even in a zero-death attempt, thanks to the mid-level Pizza.
Note to Konami: WHERE are all the Pizzas in this game??? All of the other episodes have them in almost every level!
Slash:
This guy's a minor annoyance. 6 hits and he's done, but he sometimes misbehaves by doing his pinball move, which not only wastes time, but is also VERY dangerous if you try and Kick him. Fortunately, this time he decided to roll over and play dead for me like a good dumb animal. :)
Bridge 2:
Another nice, crisp area. Everyone went smoothly, though I would have liked to have gotten all 3 of those Boomerang Foot Soldiers in one kick. Oh well.
Bebop:
Mike has it easy with Bebop: Wait for him to swing his ball-n-chain, then Kick him for a double-hit EVERY time. By the time you land, as long as you don't hit the edge of the screen, you're out of Bebop's kicking range.
Normally, I have more energy, so I'm usually more aggressive than what you see here. You don't really need to wait for him to get out of the corner, but if you don't, things can go wrong if you're unlucky.
Time: 155 Best: 159
* Scene 4 *
Manhattan:
More efficient, conservative play here. The only times that I Kick anything are against the Stone Warriors.
Subway:
Things get a little tight in this area. I usually have a spare life bar or two, which I like to have for the pouncing Foot Soldiers. Here's where at least attempting to run this game with Raph came in handy. I've had LOTS of practice with this area and being low on life!
Dirtbag:
This guy is my nemesis when I use Raph, but he's really easy with Mike if you know what to do. I just Kick from the lower level and it connects while Dirtbag is still above me. I then fake like I'm jumping to the upper level to make him jump. Repeat. Those double-hits are no accident either! Precise timing is all you need.
Time: 129 Best: 131
* Scene 5 *
Sewers Area 1:
Nothing really special here. I've improved a lot on that screen with the white fleas, but most of this is just routine stuff.
Mother Mouser:
More easy pickings for Mike. Only 8 hits are needed, and using the pattern you see here gives you 6 of them on just 3 Kicks!
Sewers Area 2:
More fun in the sewers. I had a few life bars to spare, so you even get to see some extra Kicks!
Leatherhead:
Here's another boss that is hard for me when using Raph. Mike again makes it almost a sure thing. Note that I take some time near the end to draw him to the top of the platform. This is important for two reasons:
1. You need to stay below him as you Kick to avoid damage from all those spin moves, so this gives you some extra room.
2. You do NOT want him to use his dash move, which he does when his health is low. Setting him up just before this point usually prevents the move completely.
Note: For best results, move him to the top when you have 4 life bars left. He's never dashed at me at this point, and even if he did, I'd only lose 3 life bars. No problem!
Time: 138 (Best!)
* Scene 6 *
Technodrome:
Another fun area. The ones with Pizza in the middle tend to be like that. :) Seriously, things really came together on this level, so it should be fun to watch.
Note how Mike can kill all of the little helicopters with one Kick, just like Raph could. The positioning is slightly different is all.
I suppose that I could have used more Kicks in the second half of this stage. After all, Rahzar is easy and there's no way that I'd have any extra life bars when I reach Shredder. Still, I've been burned by Rahzar before, so it's an old habit for me to safe a few bars for him.
Rahzar:
This guy plays almost exactly the same, whether you use Raph or Mike. The only difference is that Mike's Kicks are usually good for a double-hit!
Note that it's possible to get in more than one Kick in between Rahzar's dashing-claw moves. However, I find that trying to do so tends to make him use his ice attacks, which wastes time in the long run.
Shredder:
I HATE THIS BOSS! I never imagined that it would turn out this way, but most of my zero-death attempts with Mike actually ended here! If not for this guy, I could get Mike to Krang without dying almost every time!
Of all the bosses in the game, this is the ONLY one where I would favor Raph over Mike. The problem with Mike is that Shredder uses a LOT of jump kicks, which have a nasty habit of catching you just as you land from your own Kicks.
Luckily, it's possible to "control" Shredder somewhat. If you stand just below him (or above) and walk sideways, he'll retreat in the same direction. Doing this allows you to move Shredder to the sides of the screen before Kicking. Shredder almost always jump kicks after your Kick, but if you're on one end of the screen, he'll first bounce away to the other one first, giving you time to set up your next move.
It's possible to set Shredder up so that you can simply Kick like mad without dying, but it's VERY risky. I started out trying to do this, as it's a bit easier right at the beginning, but no dice. No problem, as long as I live to play on!
Time: 120 Best: 121
* Scene 7 *
Elevator:
You can't hear me, but I'm breathing a HUGE sigh of relief right now. Every time I get here, I know that the game's on, as it's extremely rare for me to die short of Krang now. On we go!
I screwed up the Mouser bombs this time around. It's not really that hard, but sometimes I'm just a tiny bit off, which is all it takes. Raph can stop these things MUCH easier.
Roof:
If you're looking for a reason why Raph will always be the faster speed runner, look no further. All of those triplets of Foot Soldiers that line up so nicely for Raph to Drill, Mike has to throw. Mike's Kick can take out two of a line, with a relatively easy throw for the third, but I opt not to waste my life meter for this run.
Tokka:
After Shredder and before Krang, this is nothing! He has much less stamina and almost every Kick will count double. Still, Tokka can still ruin a good run if you're not careful. A few things to watch for here:
1. If he freezes for a split second, he's about to jump at you. He's really good at changing his height on the screen as he does this, so it's best to stand back. It's easy enough to Kick him when he lands, so just wait for it!
2. When he raises his shield, he's about to do a series of 4 dash punches. If you stand slightly lower than him and wait, the punches will miss. BUT, if you Kick him while he's getting ready to start a new punch, he'll change height and catch you as you land! It's best to wait until he starts each punch animation before Kicking.
3. After he's done with 4 dash punches, he always jumps backwards twice without attacking. This is another perfect time to Kick him!
Time: 119 (Best!)
* Scene 8 *
Spaceship Room 1: There's NO way I'm using Kicks in this area. Though there's hardly anything new, the enemies are a bit more crafty than anywhere else in the game, making them rather dangerous if you waste your life meter!
Mother Mouser (again): Here's a rare treat for me. It's the same pattern from before, but I normally don't get this many double-hits in. This is the fastest I've ever killed him!
And yes, I landed in the electric doorway on purpose. :) Hey, I just got fresh life meter, so why not? It actually makes the pattern work better!
Spaceship Room 2: Okay, it's showtime! Hardest area in the game and I manage to only lose 5 bars of life from the Pizza to the end! Other than a bonehead moment when I got caught in a barrel, I really like this part. Plus, having 11 bars going into the fight with Krang is awesome!
* Krang *
Behold the ultimate destroyer of TMNT 3! Krang is tough enough to make casual gamers fail to even beat the game, random enough to keep speed runners up at night, and mean enough to thwart any fool who dares to fight him with a perfect game on the line!
But now, his time has come. It's taken me 2 months of fruitless attempts with Raph, plus another 3 weeks of work with Mike, but I've FINALLY discovered a fool-proof way to kill him. Now, watch him fall!
Here's how it goes:
1. As Krang enters the room, position Mike so that his head intersects with Krang's portal. This lines you up perfectly for an opening blow, which Krang will be unable to counter. It's possible for this kick to do anywhere from 1 to 3 hits, but your goal is to get 2. You'll see why in a bit.
2. Next, work him into the slanted wall. Just like with Shredder before, stand slightly below him and to one side, then move down and sideways. Krang will mirror your movements, though he may stop to launch a few missiles (when he does, just stay close until he stops and they'll miss). Once you get him to the wall, Krang can't move at all, as long as you stay close. This eliminates all of Krang's attacks except for the missiles! Better still, EACH Kick from Mike is worth THREE hits while he's against the wall like this!
3. Start pummeling Krang against the wall, but make sure to STOP just before you hit him 12 times. Why? Because that's when he splits apart, which is his most dangerous form. The less time he's split, the better.
4. Having hit Krang somewhere between 9 and 11 times (hopefully 11, thanks to that first blow from Step 1), wait until he starts firing missiles before attacking again. You should be able to get in 2 kicks (6 hits) before his split form begins. This greatly reduces the number of hits you'll need to get during the tough part.
5. I always take a chance with an extra Kick just after Krang splits. If neither part makes a sudden move, you can do a TON of damage with this one Kick.
6. Now we only need to get in about 5-8 more hits to make Krang return to one piece. I play it safe here by doing lots of ordinary jump kicks (aimed AWAY from either part). This tends to make the legs do their attack that goes across the entire room, which is more predictable. Then, while the legs are busy hopping away from you, it's safe go for the body.
7. Once Krang joins back together, you've got it made. Just force him into the slanted wall again and attack when he launches missiles. Technically, you don't even have to wait, but I did. There's an outside chance that Krang will use his electricity move as you land from a Kick. Even if he uses this, it probably won't hit you, but it can. I think you'd agree that this would be an AWFUL way to lose this run!
* Super Shredder *
So here I am, past Krang for only the second time ever in a zero-death run. The first time was two days before, when I blinked as 'ol Shred decided to teleport on top of me (grrrr...). That said, I hope that you'll understand my ultra-conservative approach to this last battle!
The ONLY safe time to attack is when he uses the lightning move. Each Kick is worth a double-hit. One important detail: You want to time your last Kick so that it starts AFTER Super Shredder's lightning burst stops shooting into the sky. This will ensure that you're still safely in the air when the lightning bolt comes back down.
Just after each lightning bolt, Super Shredder will teleport once or twice. If he appears ANYWHERE near you, do NOT choke like I did...KICK AWAY FROM HIM! At worst, he'll try and slash or kick you, but you'll either be in the air or out of range.
During ANY other part of the battle, my plan was run, run and run some more! :) Just like with "normal" Shredder and Krang, it's possible to manipulate Super Shredder's movements so that he can't attack you. So, I simply walk him around the room until he decides to shoot some more lightning.
Even with such a simple plan, I managed to get into a couple of jams near the end. You do NOT want to get stuck in the top or bottom of the screen like I did. I was actually playing defense as I was Kicking at him there! I just thank my lucky stars that SS decided to behave (for once). He could have ruined everything if he would have simply come up a little higher. Thankfully, before anything could go wrong, the final blow was delivered!
* Epilogue *
Victory in hand, now it was time to dance! No joke, I immediately flew out of my seat and jumped up and down for a good solid minute! I was then shaking for several minutes after that! I'll tell you something, I've done lots of other speed runs, but the sheer thrill of victory on this one just topped them all! Not quite sure if it came from the accomplishment itself or the thought that I never have to play this game ever again as long as I live. Either way though, this was special!
Anyway, that's the end of the story. If you enjoyed watching this run even a tenth as much as I enjoyed pulling it off, I'll be happier still. See you next time! - Tom V.