![]()
![]()
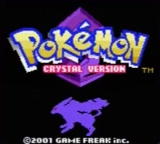
Released on July 29, 2001, Pokémon Crystal was a Game Boy Color special edition of Pokémon Gold/Silver. Changes included the shuffling of Pokémon locations and the option to select a female protagonist, as well as an obvious graphical boost.
Best Versus Red, Single-segment Time: 3:16 by 'Keizaron' on 2015-07-02
Get Flash to see this player.
Author's comments:
Right away, I'd like to point out if you want to see the live run of this, you can find it on YouTube: https://youtu.be/o7hQrCwiWC4
I'd like to give thanks/shoutouts to the entirety of the Crystal community. Everybody put in a ton of work to create this route.
Pokémon Crystal is the third game in the series' second generation. Featuring a slightly updated storyline, full Game Boy Color only compatibility, and a ton of extra side bits, it is to Gold/Silver what Yellow is to Red/Blue. Being a simple RPG, we need a combination of great luck and good execution to even beat the game in general.
Another important bit about the second generation of games is its introduction of "spinners". These are trainers that look in multiple directions with little to no mercy. While there is a small chance to predict their movement, it's not a sure thing at all. There are "paired" directions for a spinner; down and right are a pair while up and left are a pair. A spinner is more likely to change to a paired direction than an unpaired direction, so attempts to dodge them try to take advantage of that. It doesn't always work, unfortunately. I hit two within the run.
Beginning: Girl was chosen since I tend to confuse Gold and Crystal otherwise (Gold has only a boy option). 5:50 PM was selected so Route 30 is day and Route 31 is night after we receive Pokeballs. This allows a chance at Sentret for Cut and Poliwag for Whirlpool and Waterfall early on, then Oddish later on if Sentret was missed. "A" for one character to save frames. Sunday is necessary for the Return TM later, no DST saves 3 frames, and we know how to use a phone because we're young and hip. Totodile is nicknamed "A" for frames again, and his stats are immediately checked to see if the Totodile is runnable. We see the following:
HP: 21 (10-15 DV)
Attack: 13 (15 DV)
Defense: 12 (6-15 DV)
Special Attack: 10
Special Defense: 11 (12-15 DV)
Speed: 9 (0-6 DV)
DVs are hidden stat values between 0-15 that determine growth rate of that particular stat, with Special Attack and Special Defense sharing a DV. Everything is as high as it could be at level 5 except Speed. Speed is on the lowest end of the spectrum, and low Speed can be detrimental in a few key fights, most notably Rival 2. Because I had perfect Attack, I decided to go for it. Other stats need more information at this point, so I continue to monitor them. HP for the most part is irrelevant to me, so I only keep an eye on Defense, Special and Speed.
Mr. Pokemon/Rival: We actually go for a very long stretch before we get our first encounter, which is a level 4 Hoppip. I kill the Hoppip to ensure an early enough level before the first gym to avoid being outsped by most of the trainers within. Two total encounters before Mr. Pokemon's house is very good. On the way back home, we get zero encounters, totalling for fantastic beginning luck.
The rival fight went splendidly. Growl fail means Chikorita is an easy 4-shot, whereas a Growl hit would've made the fight take ages. Because of the Hoppip we killed earlier, we actually gain two levels and learn the following of our stats:
Defense: 16 (14-15 DV)
Special Attack: 13
Special Defense: 13 (13-15 DV)
Speed: 11 (0-6 DV)
Our speed is still looking worrisome, but our other stats are very good. We head back to Elm's Lab to advance the story. Rival is named one character to save frames yet again.
Route 29: We get one encounter, but it wasn't a Sentret, so we move on.
Route 30: Encounter luck from here on out was okay, but not fantastic. Upon fighting Youngster Mikey, the night cycle activates, giving us Poliwag and Bellsprout as possible HM slave options. Fight here is pretty standard. Afterwards, we determine the following of our stats:
Special Attack: 14
Speed: 12 (0-4 DV)
The speed is worrisome at this point. Rival 2 is an incredibly difficult fight, and low Speed can lead to a horrible death. No Poliwag in sight, so we move on. We equip a Berry to essentially give us +10 HP for one fight, and since we're in the menu already, we call Mom to avoid her calling us in a second.
Route 31: Potion is picked up to have more healing items, and Bitter Berry is essential for future troll fights. No Poliwag or Bellsprout, so we move on to Violet City.
Violet City: We head straight for Falkner's Gym. Youngster Albert's Spearow is very tough, typically requiring more HP than you have to win, thus the Berry being attached. Fight goes decently enough. Further stat deduction:
Speed: 14 (5 DV)
Speed seemingly skipped its possible DV ranges, but that's where the Hoppip from earlier comes in. Hoppip gave us enough stat experience to basically give us an extra Speed DV. 5 DV is just good enough to avoid any mishaps, with only one fight being a potential troll. The rest of the gym is just managing health decently enough to survive Rage buildups. Standard gym. We learn the following:
Special Attack: 17
Special Defense: 18 (15 DV)
Yes! We have an excellent, but slow, Totodile. Attack is max, Special is max, Defense is potentially max, and our Speed is just enough to make it through. At this point, I'm excited for the rest of the run. Falkner split is 15:45 with no HM slaves.
Violet City: We take the Center to recover our Rage PP, and we take the Egg because we have no choice. After that, we head for Route 32, grabbing the Przcureberry along the way.
Route 32: We get a Bellsprout encounter, but I decide against it, opting to wait for Oddish in Ilex Forest. While Bellsprout does indeed learn Cut, we still need to catch a Poliwag, and Oddish has a chance to have the move Sweet Scent. Sweet Scent grants you an instant encounter, very valuable for hunting for a Poliwag. We pick up the convenient Repel for Union Cave coming up. I opt to go to the right and risk a spinner instead of taking the left path and potentially getting trolled by encounters.
Union Cave: Russell isn't typically pause buffered because he gives similar experience to another trainer in the cave named Bill, who can be skipped if you hit Russell. Russell fight is horribly slow since you have to use Rage on 3 Geodudes, but we make it past without major issue. Upon exiting Union Cave, we reach another spinner, Anthony. He WILL end your run if you don't have a Poliwag or Bellsprout to save the day. We pass him with no issue.
Azalea Town: We go straight to Kurt to activate the Slowpoke Well sequence, then we take a shopping trip. This shopping trip was slightly different than a standard one; I bought one extra Repel to avoid encounters in Slowpoke Well since I had to menu anyway to heal my Totodile. The entirety of Slowpoke Well goes pretty standard. We either get valuable criticals or hit all of our ranges, making this go over relatively quickly. Unfortunately, we lose our Bitter Berry, which holds value for a couple more fights. Final fight ends at 26:22. We get a free heal and immediately go to Azalea Gym.
Azalea Gym: We fight the right twin to hopefully avoid multiple chances at Supersonic. We don't get it so we are in good shape. Next fight can be a little annoying because you have two chances to get poisoned, which we do. We unfortunately hit our second spinner, Benny. Benny takes a bit of time to beat, so this is painful time loss. The Bugsy fight itself went pretty standard. Bugsy split is 32:17 with no HM slaves still.
Ilex Forest: Immediately before entering the forest, we teach Fury Cutter (without it, we can't beat Rival 2's Bayleef) and head into the scariest fight in the game. This is the most common chokepoint of a run, for good reason. Bayleef has Razor Leaf, which has a 25% chance to critical. Critical is almost certainly death to the run, either via an immediate loss or a huge chunk of time. Fury Cutter can also miss 5% of the time, which resets the accruing damage. We get an extremely lucky fight; Gastly missed Hypnosis, Bayleef didn't do a single bit of damage and Zubat was pretty normal. Once our Repel wears off, we begin the hunt for an Oddish. We find the level 7, which is perfect because it has Sweet Scent. However, we lose a good chunk of time here to Oddish breaking out of the ball a couple times. We go out of our way to get TM02, Headbutt. This is an extremely powerful move for this point in the game and makes otherwise difficult fights more manageable. We then make our way to Goldenrod City
Goldenrod City: We take a quick detour to get the Bicycle for improved movement. We grab Kenya (a Spearow) from the gatehouse guard so we can have a Fly slave, and we proceed to probably the worst part of the game in terms of variance. Commonly referred to as "Spinner Hell", there are two time wasting spinners and a rotator that must be dodged. We go through this part a total of three times, so the likelihood of hitting one of them is pretty high. We successfully make it past the first time, activating the first part of the Sudowoodo quest, and head back through Spinner Hell. After some... questionable movement, we make it through a second time unscathed and head to Whitney's Gym.
Goldenrod Gym: There are only two required fights here. The first, a Snubbull, can troll with Paralysis or stat drops, but luckily we score a flinch with Headbutt (a 30% chance) and the fight goes very quickly. Whitney herself is also a common chokepoint. Clefairy has Metronome, a move that can be almost anything, while Miltank is very tanky and has Stomp, a flinching move, and Rollout, a buildup move similar to Rage and Fury Cutter. Because of our excellent Defense, I go with Rage stacks over Fury Cutter stacks. The end of the fight was extremely scary, but we pull through. We learn Bite as a valuable PP management tool. Whitney split is 43:57 without a Poliwag.
Goldenrod City: We grab the Squirtbottle for the Sudowoodo quest, then we take a detour to the underground and fight a couple trainers. This costs a little bit of time in movement, but these fights are required eventually anyway, and they make some fights as Croconaw a bit more tolerable. We deposit Croconaw to heal and the Egg to avoid the hatching cutscene, then we shop for some items to help us along the way. We successfully avoid spinners in Spinner Hell for a third and final time. After waking up Sudowoodo, we head straight to Ecruteak City, avoiding another spinner along the way.
Ecruteak City: We head to the Kimono Girls immediately so we can get HM03 Surf. Headbutt has further value here because every Kimono fight is at minimum two turns without a critical, so flinching helps save time. The fights go over pretty decently, with a valuable critcal/flinch on Umbreon, saving a ton of time and avoiding potential trolling. After picking up Surf, we heal up and teach some moves (Surf and Ice Punch) and head to Burnt Tower.
Burnt Tower: We fight our Rival for the third time here. This fight can be pretty scary if things don't go well, since ther are some scary ranges and Bayleef can still kill you with Razor Leaf criticals, but luckily we pull through. After the fight, we activate the legendary dogs sequence and head for Morty's Gym.
Ecruteak Gym: Nothing special about these fights, just some PP management here and there. Morty himself can be a major troll, since Gastly has both Curse and Lick. We have to set up for two turns to both outspeed and be able to kill. We get no Curse and no paralysis from Lick while setting up, so the rest of the fight is pretty much guaranteed from here. A nice flinch on Gengar saves potential Hypnosis trolling. Morty split is 1:02:07 without a Poliwag.
Route 38/39: Route 38 has two spinners to dodge. Fortunately, both of them get stuck, so we make it out unscathed. Route 39 has one required fight with a weak Pikachu, so we blitz past that no problem.
Olivine City: Upon approaching the gym, we have to deal with our Rival blabbing some nonsense. We go shopping for some health items and Super Repels, then head to the Lighthouse to begin the Ampharos quest. There are 3 mandatory fights and one spinner to dodge. Fights go pretty well, and we "successfully" dodge Ernest (in what was easily the worst spinner dodge in history). We take a detour to get a Rare Candy so we can start the next gym as a fully evolved Feraligatr and proceed to exit the Lighthouse. We stop by the cafe to pick up HM04 Strength since it is required to pass the next gym, then we begin our first trek in the water.
Route 40/41: Route 40 is uneventful, whereas Route 41 has Kaylee, an infuriating spinner. While pause buffering her, we teach Strength since we're already in a menu, then we sneak by her undetected and make it to Cianwood City, where we head straight for the Gym.
Cianwood Gym: Every trainer is required here, which is incredibly stupid. Each fight has a way to troll you. Most of the fights come down to Strength and Surf PP management, so some odd combinations of moves are used here and there. Chuck himself can be hazardous; Primeape has Leer and Poliwrath has Dynamic Punch, which is horribly inaccurate but automatically confuses you when it hits. Luckily, Poliwrath uses Mind Reader and we finish the fight without much troble. Chuck split is 1:13:46 without a Poliwag.
Cianwood City: Upon exiting the Gym, we get HM02 Fly from Chuck's wife and pick up the SecretPotion for the Ampharos quest, which we'll complete in a little bit. Now that Kenya can Fly, we head back to Ecruteak and head east.
Lake of Rage: Nothing terribly exciting here. There's one spinner to dodge on Route 42, which we do. We ignore Mahogany Town for now and make our way onto Route 43 to reach the Lake of Rage. We use a Poke Doll to escape the battle and obtain the Red Scale to advance the story. After a quick chitchat with Lance, we Fly back to Mahogany Town and begin the Rocket Hideout quest.
Rocket Hideout: There's literally nothing to this place. Some damage ranges here and there, one spinner that's required to fight anyway and one spinner that's an obnoxious time waste. Because of how overleveled we are, everything here dies in one to two hits. We dodge the spinner twice, save the day (time at this point is 1:28:56) and receive some goodies from Lance. Upon exiting, we Fly back to Olivine to complete the Ampharos quest and fight Jasmine. It should be noted, if we caught an early Poliwag, we would go straight to Pryce's Gym instead, but since we still need a Poliwag, we opt to do him later since there is a pond directly east of the gym that gives Poliwag.
Olivine City/Gym: We make a quick climb back up the Lighthouse, dodging Ernest a second time. After delivering the SecretPotion, Jasmine returns to her gym. Easiest Gym in the entire game; no trainers and three Pokemon that die in one turn each. Jasmine split is 1:32:25 without a Poliwag. We Fly back to Mahogany and go straight to the Gym.
Mahogany Gym: This place is stupid. There is a movement puzzle that involves the icy floor, and there's a spinner named Douglas on the way that you must pass twice. There is literally NO WAY to try and dodge him, just hope and pray. We pass him once, giving me some hope, then we pass him a second time. What a dodge! This saves significant time and at this point, I'm excited. 3:17 became incredibly doable, with 3:16 also becoming a possibility. Pryce's Seel at my current level (35) is not a very favourable one hit, but we get the range, saving even more time. Pryce split was 1:34:20.
Route 44/Ice Path: We head east to Route 44 to catch a Poliwag. Since we caught an Oddish with Sweet Scent earlier, we mitigate the low encounter rate in the water and get an immediate Poliwag. After a scary turn of damage, we catch Poliwag. At this point, 3:16 became incredibly doable, and my excitement was huge. We proceed to Ice Path, the most execution heavy part of the run. For funzies, I go for a difficult trick while moving the boulders for the puzzle and nail it. After we finish Ice Path, we Fly to Goldenrod City to deal with Team Rocket one more time at the Radio Tower.
Radio Tower: The most boring part of the game. It would honestly be a waste of time to commentate on this. There are some ranges, some of which we got and some of which we didn't get. PP management is very calculated. The only note of significance is where the route begins its massive change from the past. We take Goldenrod Mart a second time to get TM27 Return. Return is a move based on your Pokemon's happiness, and it is extremely powerful late game. There was one boo-boo, in this split, which was me forgetting to teach Return right away, but it resulted in minimal time loss. Once the Radio Tower is saved (2:03:59 being the time), we grab a Pink Bow from one of the staff (Pink Bow increases the power of Normal-type moves like Return and Strength) and get the Radio Card for our PokeGear. We Fly to Blackthorn and head to the final Gym in Johto.
Blackthorn Gym: Most of the trainers here are required. None of them pose much of a threat, with the only problem being two Seadras that have Smokescreen, but we make it through just fine. The Clair fight can be problematic with bad Special Attack, but ours is perfect and we make it through the fight without casualty. Clair split is 2:11:49. However, she doesn't give us our badge, instead making us complete the Dragon's Den quest. After knocking out a trainer and some silly questions, we finally get our badge and begin our trek to the Elite Four.
Route 27: Nothing terribly exciting here. There's only one required fight, but there is one spinner named Joyce we have to dodge. I take a few extra steps of movement in certain places to make our Super Repel wear off in a way that we can buffer Joyce. A sloppy dodge, but we were successful. We continue on to Victory Road.
Victory Road: Victory Road is... very empty compared to every other Pokemon game. We skip Earthquake, a TM we used to pick up in the old route; Return with a Pink Bow is THAT powerful. We fight our Rival for the fifth and final time at the exit. Simple fight, with only one range on the Meganium (which we of course miss). After the fight, we shop for some Full Restores and begin the Elite Four.
Will: What's normally a not so bad fight became extremely scary. A problematic critical hit from Slowbro put us at very low health, and if it weren't for our fantastic Defense, Xatu would have most likely used Quick Attack and killed the run. We make it through in the worst way. Will split is 2:23:08.
Koga: This split already started off handicapped, since we had to heal. Koga can be a troll, but Return strats changed how we approach the fight. Now, we use an X Accuracy to avoid any trolly misses. Crobat is a range, but we get it. Pretty clean fight. Koga split is 2:25:38.
Bruno: Another fight changed by Return strats. We set up for two turns instead of one since Hitmontop is very likely to use Dig, and we don't have Earthquake to kill him underground. Machamp is a favourable range that we get. Another clean fight. Bruno split is 2:27:45.
Karen: This is another fight that can troll. Umbreon has Sand-Attack. If it is used, we have to set up an X Accuracy. This fight also features the second-to-last fight where speed matters. Gengar outspeeds us (I was completely forgetful of this fact during the run) but does nothing to us, and we finish the fight well enough. Karen split is 2:30:00.
Lance: Easily one of the most underwhelming Champion fights in the Pokemon series. There is one range to watch out for (level 50 Dragonite) which I chose not to go for since we didn't need to save that turn to still get a 3:16. Aerodactyl is also faster, and if he uses Ancientpower and gets the boosts, he survives an extra turn. That doesn't happen, and we are now the Elite Four Champion. Lance split is 2:33:03.
It should be noted, the in-game timer does not advance during the credits, so they aren't skipped, and is usually used as a bit of a break from such a long run.
Trip to Kanto: We get a boat ticket from Prof. Elm and head to Olivine to board the SS Aqua. Nothing terribly exciting here. After making it to Kanto, specifically Vermilion City, we make our way to Saffron City, then Cerulean City, then Route 10.
Route 10: There is an easy required fight here and a spinner named Heidi. She is one of the most infamous spinners in the game, and one of my personal least favourites, having to be dodged FOUR times. We get past her on this trip and make our way to the Power Plant to start the Power Plant quest, then head back to Cerulean City to advance the quest some more.
Cerulean City/Nugget Bridge: We head to the gym and learn that a lone Rocket Grunt is responsible for stealing the Machine Part from the Power Plant. After this, we head up to Nugget Bridge (completely ignoring the Rocket on the bridge) and breeze through the fights. At the end, we interrupt Misty's date to fully unlock her Gym for later, and we Fly to Saffron City.
Saffron City/Celadon City: Upon arriving, we head to Celadon City to take out Erika.
Celadon Gym: A few required fights, none of them posing any real threats. Erika herself is also a joke, with everything dying to Return after an X Attack. Erika split is 2:53:59. Another route change from the old route happens here; instead of taking Cycling Road (and fighting a trainer along the way) to fight Janine, we delay her and instead head back to Cerulean City to defeat Misty.
Cerulean Gym: We head around the perimeter of the gym to both avoid all the trainers and fight Misty while Surfing because swag. Misty's Lapras is a range to one hit, but we get it, saving a valuable turn. Misty split is 2:56:20. After the fight, we grab the Machine Part in the middle of the gym and make our way back to the Power Plant.
Route 10: Once again, we have to dodge Heidi. Once again, we successful avoid her twice, leaving us with two more spinners in the run. We return the Machine Part to the Power Plant so we can get the Expn. Card in Lavender Town later, then we make our way back to Saffron City to take out Sabrina.
Saffron Gym: Yet another route change happens here. We take a different set of teleporter paths to reduce the amount of spinners in the gym from two to one. We thankfully pass the spinner. Sabrina is an easy fight with our attack, ending in three turns. Sabrina split is 2:59:42.
Route 8/Lavender Town: The last spinner of the game, Tom is here. He is a MASSIVE timeloss at this point of the game, and you must pass him a whopping three times in one go. Once we passed him, I knew there was only one more obstacle to getting a 3:16: Red. We head to the Radio Tower here in Lavender Town to get the Expn. Card, which grants us access to a Poke Flute channel to wake up Snorlax in a little bit. Afterwards, we return to Vermilion City and take out Surge.
Vermilion Gym: Thank God we don't have to look inside cans in this game. We fight one required trainer then take out Lt. Surge. The fight is a joke and we win with ease. Surge split is 3:03:51. After the fight, we head towards Diglett Cave, waking up (and running from) the Snorlax in the process, then proceed to Pewter City.
Pewter Gym: One required trainer, pretty easy. Brock is also really easy, but can troll with Protect from Omastar. We don't get that and have a clean fight. Brock split is 3:07:31. We make our way down from Pewter City all the way to Cinnabar Island after the fight and activate Viridian City's Gym by talking to Blue on what was once Cinnabar Island. Afterwards, we head east to Seafoam Islands and take on Blaine in what is the saddest looking Gym ever.
Cinnabar "Gym": Blaine is a cakewalk. No threat posed at all. Blaine split is 3:11:04. Upon leaving the Gym, we surf northeast to Fuchsia City and finally take on Janine.
Fuchsia Gym: The trick with this gym is every trainer is dressed to look like Janine. Once we walk past all of them and approach the real Janine, we quickly eliminate her. Janine split is 3:13:25. After this fight, we Fly back to Viridian City and fight Blue for the 16th and final badge of the game.
Viridian Gym: This is the last fight where bad speed matters. We have to take an extra turn of setup to outspeed Blue's Alakazam. Even with max attack, there is still a range in this fight that we miss, but other than that, the fight went about as well as you'd expect with bad speed. Blue split was 3:16:57 Prof. Oak gives us a call to meet up with him in Pallet Town so he may grant us access to the final dungeon in the game, Mt. Silver.
Mt. Silver/Red: Mt. Silver is an interesting watch, since the first part of it is completely in the dark. I bonk into the walls at certain times to get a feel for where I am, and we make it past the darkness and make our way to Pkmn Trainer Red. The only thing standing in the way of a 3:16 at this point was a bad Pikachu. We have to set up for four total turns against a level 81 Pikachu that will either use Charm or Thunder. Guard Spec. helps cancel out any Charms he uses, so we lead with that item, followed by an X Speed and two X Attacks. We strike gold and get nothing but Charm from Pikachu and claim victory over one of the toughest fights in all of the Pokemon series. Final split's RTA ended up at 3:22:18. After going through the credits, we save our game to see our in-game time and see the glorious 3:16.
Final Thoughts: Other than the slow/rough start, there was so much to love about this run. Proper risks were taken, execution for the most part was incredible, and we got luck in all the right places. Crystal can still be brought down another minute or two, but this is an incredible start to killing the game.
Thanks for watching this run, and I hope you enjoyed Pokemon Crystal!