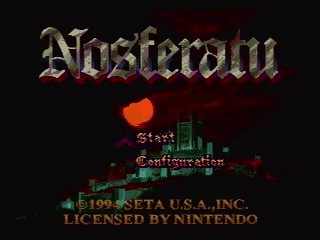
This rather charming '94 SNES platformer was created by a Japanese publisher called SETA. Not many of SETA's games are well-known outside Japan seeing as the company (shortened from "Super Entertainment and Total Amusement") mostly ever shipped for their home market, but after being exposed to Nosferatu, one can't help thinking there might be something else worth looking into within its catalogue. The game by rights should have been called "Prince of Transylvania", such is the similarity in design between this and its rotoscoped predecessor, but one cannot miss the multiple innovations and improvements this cinematic platformer had to offer. It was mostly reproved for unreactive controls and harsh difficulty.

Best time on Easy difficulty: Single-segment 0:23:11 by 'GreenKnight1294' on 2014-11-26.
Get Flash to see this player.
Author's comments:
Stage 1 Boss: This guy is very simple. His best move pre-transformation is flinging boomerang discs at you and jumping up if you're too close. The stragegy here was to push him off screen as soon as he spawns to make him jump in a more vulnerable spot to combos, then send him down to two diamonds of health as quickly as possible, which triggers his transformation. When he transforms, you just have to keep attacking him and he won't be able to do anything. In his case, the uppercuts are faster because the knee combos send him too far and you can't keep attacking, but you have to use kick combos to push him away if he gets too close.
Stage 2 Comments: There are two tricks I couldn't perform adequately on this stage, although minimal on time saving (both amounting to up to ~10 seconds) in comparison to the other several shortcuts in this stage, which do make it on the run. On 2-A, you can bypass the moving door in the first cycle by getting there in a specific amount of frames, I found out later how and it saves around 6 seconds; on 2-B you can save up to 4~5 seconds by slidding under the frankenstein, but it's a very precise trick and I can get it only around 30% of the time.
Stage 2 Boss: It's possible to lock them together and hit them both at the same time to end the fight a couple of seconds faster if you're fast and lucky. Although I wasn't lucky it only saves a couple of seconds from a well executed fight.
Stage 3 Boss: This boss was the biggest puzzle while routing. He roams around the screen and he's only vulnerable in a specific set of frames. If you fail to damage him he will grab you and fling you around, and if you use normal combos he takes too long to kill. Eventually I found out how to use knee combos consistently with him and that's pretty much it. In his second phase he'll always bounce on the same places after you knock him off screen once, and you can use that to your advantage keeping him locked getting pummeled against the edge of the screen.
Stage 4 Boss: This guy was the biggest pain in routing the game. The fastest way to kill him is to take a hit every time he shoots a head at you, also a lot easier than having to dodge it up close, which barely leaves you with enough health to beat him, even if you had a perfectly executed stage. The only power-up taken in the whole run for safety on Stage 3 is thanks to him, which wastes negligible time as it's a chest right in the way, which also sets the global timer in a convenient way. The execution with him was flawless in the run.
Stage 5 Boss: This golem is a huge troll. Albeit it's not easy, you can manipulate all his patterns. I screwed up once and he started shooting his arms, but I managed to dodge it and trigger his other patterns quickly. It was the slowest fight in the run thanks to a missed cycle with the strategy I had before.
Stage 6 Boss, Nosferatu himself: He can troll you right off the bat and fly in the air for as much time as he wants, but if you dodge his attacks he's extremely vulnerable. Sadly he got me at the beginning and grabbed me, so I couldn't finish him off on his bat form, which could have saved a couple of extra seconds of him flying around. Otherwise he was very cooperative with his flying pattern and saved a bit of time with it.
TAS-only Strats; there are two that are used in the fastest TAS run, one is clipping through floors into invisible platforms, which in almost all instances requires you to have frame-perfect mashing and be able to run in place before a ledge, both of which I haven't been able to replicate; the other is a frame perfect combo that deals the most damage in-game without the upgrades and requires waiting exactly 9 frames after performing a very specific set of inputs, which I don't use because it's not reliable and very random (you can attempt it and get it on occasion during certain combo inputs, but doing so requires you to be using sub-optimal attacks and makes everything slower each time you fail at it).