![]()
![]()
Released on August 27, 2008, Castle Crashers is one of the most popular games on Xbox Live Arcade, surpassing a million downloads. Developed by Behemoth, of Alien Hominid fame, this game is a throwback to the days of Technos beat 'em ups such as Double Dragon and River City Ransom. Those old games lack a certain amount of animals crapping themselves, however: a void that Castle Crashers neatly fills.
Category Note: Characters are not considered separate categories for a new game run because there are not enough differences between the characters. Ask Mike for more information.
Best time: 1:14:34 by Mike Uyama on 2009-05-22.
Get Flash to see this player.
Author's comments:
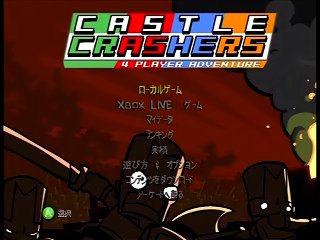
Also, the game is in Japanese because that's what my 360's language settings are set to. I apologize for the important dialogue you'll be missing such as, "Return to map", and "You collected the relics, let's go!"
I bought this game when I first started downloading arcade games off Xbox Live. I immediately became hooked the moment I played it. I wouldn't say this is the best beat 'em up I've ever played, but it's definitely a lot of fun and has more personality than 99% of the games I've played.
Thanks
Fighting
The most important part of the game. If you don't have good fighting strategies, you're boned.
Grouping enemies is one of the most important things to do in a beat 'em up speedrun, and Castle Crashers is no exception. Fortunately, it's pretty easy to group enemies in Castle Crashers because of how flexible the air juggling is.
Until I reach level 8, the best combo to juggle enemies with is XYY in the air. Once you reach level 8, the best combo is XXYY, as the XYY combo changes. Despite the XXYY combo being slower, the change isn't as bad as you think, because you also get to use the XYY glitch.
If you know an enemy is going to die in one or two hits, then it's better to hit them with a couple of X attacks so they'll go into their death animations more quickly (enemies don't die until they hit the ground, and you can't progress until all enemies are dead).
Heavy (i.e. almost everyone in the Cyclops's Lair) enemies are dealt with using (XXX)YYYXYY on the ground. I don't want to use air combos against heavy enemies because they can only be juggled for 1-3 hits before dropping straight to the ground. Using XXX depends on whether I've hit the enemies before and if there are enemies around the area I could possibly catch. The XXX combo in the beginning sometimes helps me catch extra enemies in my combo.
Big enemies will either fly up in the air a bit, or fall down immediately when you hit them for the fourth time in the air.
If a big guy flies up into the air on the fourth hit, it's possible to juggle them.
If a big guy falls down immediately, they cannot be juggled. In theory, you can take out these guys faster repeatedly attacking with YYY about a character width a apart, then jump attacking after the last Y hit. However, this strategy is very risky and inconsistent. If you're thrown, any time gained from the strategy is lost.
Below is a list of big guys and their properties.
Dashing Y attacks are slightly faster than dashing normally. I think the time saved is one second per every 20 dash attacks.
The big movement glitch is staying in the air with XYY. To perform this glitch, you press X right as you jump off the ground (I personally press X+A simultaneously), then press Y twice (make sure you time it so your sword twirls when you press Y a second time). After you press Y a second time, press X, then press Y twice again. Repeat until done. You can perform this glitch for as long as you want, as long as if you don't hit the ceiling (the ceiling exists in every stage, visible or not).
The three benefits to this glitch are:
The benefits of the glitch should be obvious as you watch the run.
Planning
Planning turned out to be surprisingly easy, which is good, because I'm terrible at planning.
The basic plan was that I wanted everything that raises my strength, and I wanted enough money so I could buy sandwiches for both the Volcano and Corn boss in one trip.
Fortunately, both of these goals were easily be achieved without going out of my way to gather money.
Weapons:
There's a Tenderizer in the Thieves' Forest that gives me +2 strength. It's as if the developers wanted to help speedrunners. ;)
Once I finish the Cyclops's lair, I have enough money for a Black Paddle, which gives me +5 strength, which is the maximum strength bonus you can get from a weapon that's not DLC (Golden Sword).
Animals:
This was also easy, I want to collect Snoot the elephant. He adds +2 strength, and he's very easy to collect.
I collect the seahorse in the Thieves' Forest because I don't need to worry about navigating through the water when I collect him.
I collect Bitey Bat after killing the Bat boss because stunning an enemy is sometimes helpful. At the very least, a stunned enemy means I'm less likely to be hit.
Once I reach the Cyclops's fortress, it's Snoot all the way.
Shopping:
When I first started this run, I thought shopping was going to be a troublesome because the Black Paddle costs 340 gold. Fortunately, it turns out that as long as if I don't use too many potions, shopping is actually quite easy.
When I exit the Catfish battle, I buy 5 potions and 3 bombs (for Snoot) before re-entering the stage. I don't need the bombs and potions right away, but shopping right after exiting the Catfish battle turned out to be optimal because I'm close to the shop at that point (only 3 stops away), and I have to do the shopping sooner or later anyways.
After killing the Cyclops. I collect a bunch of treasure, head to the Volcano shop and buy the Black Paddle, a potion (to refill my stock), and as many sandwiches as I can buy. I somehow was able to buy the maximum amount of sandwiches you can hold, 9, which had never happened before! Buying the potion hardly wasted any time, and in theory I needed to buy it because I don't go to another shop until I kill the Corn boss.
After killing the Corn boss (or after brainfarting on the map), I buy some more potions. I actually didn't need these potions in the long run, but that's because my luck in Full Moon and the Snow Field was ridiculous. I almost never get by those stages without using a potion.
I buy some sandwiches before entering the final stage. Yes, I bought too many sandwiches, but I wanted to be prepared for bad luck against the Necromancer (that never occured).
IFAQ
Q: Are you sure a strength build is best for a speedrun?
A: Yes, a strength build is best because melee is effective against all enemies, unlike magic or arrows. Leveling up strength also has immediate benefits (you do more damage), unlike agility.
Here's a quick rundown of the other builds.
Magic: There are only two classes this build should be considered for: The Red Knight and the Industrialist. Here's a quick rundown of each one.
Red Knight Pros: You will annihilate all normal enemies (this includes heavy guys).
Cons: Lightning isn't that great against bosses or big guys because the damage isn't as high as melee damage, and lightning damage isn't constant (you have to wait to recover magic after you exhaust your magic bar). Anything you have to fight in the air (Dragon, Spider) will take a long time (yes, even if you spam air spells).
Industralist Pros: Any boss that is on the ground will die instantly.
Cons: You still have to take care of that annoying segment that takes up 90% of the game called "fighting enemies". Has the same problem as the Red Knight fighting bosses in the air.
I'm pretty sure the cons outweigh the pros in both cases, but I never did much testing with either class.
Agility: Yes, agility kicks ass when it's maxed, but there are three big problems with this build:
Strength is useful throughout the entire game because you start off with all of the attacks you need, and all leveling up strength does is increase your damage (linear gains) Agility starts off as crap because you can't fire your bow quickly enough to juggle enemies and the damage you deal is crap. Unlike strength, agility's gains are exponential - every point you put into agility not only increases your damage, it also increases how fast you can fire your bow. Because of this, agility doesn't really become useful until you have about 21-22 points in it, which is when you can start juggling enemies with your bow.
The process of increasing your agility that high is very painful and you lose at least 8-10 minutes by the time you beat the Cyclops.
Q: Why level up vitality after Strength? Why not agility?
A: I need the vitality to survive later parts of the game. If you don't believe me, look at how much damage the skeleton in the graveyard did to me. Now think about how many enemies I fight in the Necromancer's room.
I would need at least 3 points in agility before it starts having an effect (a very small one) because the Black Paddle has a penalty of -2 agility.
Q: Why do you sometimes leap up after doing XY, and other times you just spin your sword?
A: I would love to know myself. :(
Q: Why do you almost never block?
A: What's a block?
Q: Why do you approach enemies from an angle constantly?
A: This is a beat 'em up basic - you approach enemies at an angle because they're much less likely to hit you that way.
Q: Wouldn't it be faster to use XY on the ground repeatedly against the Barbarian boss?
A: In theory, yes, XY on the ground deals damage more quickly than XY in the air. In reality, no, staying right above or below the boss while in the air puts you out of his line of sight. If you hit the boss while you're on the ground, you're still in his line of sight and he'll start attacking you.
Q: Does it really save time to exit, then re-enter the Catfish battle?
A: Yes, without the additional strength it's impossible to kill the Catfish in one cycle. Killing the Catfish in one cycle saves about 10 seconds, despite the time wasted going in and out of the stage. Well, normally exiting and re-entering would save 10 seconds, it probably only saved 5 seconds in this run. :-/
Q: Can't you just XYY over the arrow shooters in the High Field?
A: No, I'm only level 6 at that point. I don't obtain the XYY combo until I'm level 8.
Q: Is it possible to exit the map after you kill the Bat?
A: No, you have to replay the stage unless if you walk out the cave.
Q: Why didn't you perform the Full Moon skip?
A: Because I didn't know about it until after I did my run. The skip probably doesn't qualify as a separate category, as it only skips one stage. Hard to say because you do have to exit the game to perform it.
Q: Is it possible to kill the Reanimated Cyclops in one cycle?
A: I'm sure it's possible, as there is a sweet spot where you can hit the Cyclops
and he'll just run up and down the screen. However, the chances of actually getting in the sweet spot in a run are one in a million. Honestly, I've come very close (5% of his life), but I've never killed the Reanimated Cyclops in one cycle.
Q: You mentioned there was one exception to the lack of moveslist variety on your audio commentary, but you never mentioned what it was. What is it?
A: The exception is the Green Knight, whose second Y attack is a backflip instead of the usual weapon twirl. This difference shouldn't be significant,
but it prevents the Green Knight from infinitely juggling enemies because the backflip doesn't gain as much height as the weapon twirl. As you can probably guess,
this exception isn't a good thing, it simply makes the Green Knight the worst character in the game.
Stage-by-Stage Rundown
I won't be too nitpicky with comments like I usually am because this game is random (enemy spawns and a couple of boss patterns are fixed, that's about it). The chances of getting a nearly perfect run are close to nil.
First stage: Went pretty well, not much to say except most of my enemy grouping went well.
Barbarian battlefield:
I lost a few seconds on the mid boss because I launched myself too high, but aside from that, the stage went really well.
Boss: I got really good luck here - you want the boss to throw himself into the corner like that, it causes some sort AI bug where he just stays in place. I missed a couple of hits, but that probably doesn't cost me more than a second or two, and it's really hard to see when his big fat ass is blocking my view.
Forest Entrance: I hate that big hooded asshole, he always manages to throw me once. :( Aside from that, this level went pretty well.
Thieves' Forest: A slip-up or two here and there, but nothing major.
Chase Scene: So boring, I never even bothered memorizing the pattern and I still never get hit. And yes, I get bored easily :P
River: Watch my 50-hit combos. :)
If you're wondering, going for the fish on the left near the end of the stage usually isn't a good idea. For some reason, it always dodges your attacks until you kill the fish on the right.
Catfish: I probably should have restarted the run right here because this battle was pretty bad, but I still got a one loop battle, which is what's important.
I estimate I lost about 6-7 seconds from that battle, all from a random execution goof and one stupid stray attack. :-/ I lost more time from the XXY combo than getting knocked down.
High Field: Good, except for the stupid arrow shooter. I didn't figure out how to get around the arrow shooter until a verifier told me you can use a dashing strong attack to get through most of the arrows.
Bat Cave: Honestly, this went exceptionally well. I almost never manage to group as many as I did here.
Bat: Quite good despite getting hit. Getting hit didn't matter too much since the boss was still in the air, and the best way to hit the boss is XYXYXY on the ground.
Flower field: Quite good really, no big problems here. My big knight battle was exceptionally good, especially since that was the first time I used the XYY combo on him. :P
Wedding Crash: Okay, here's my first string of incredible luck. Somehow all of the knights in the first and second screens decided to cooperate with me and grouped themselves together, which almost never happens.
Conehead Groom: Two things, THE BLUE KNIGHT IS VALIDATED! And this battle was absolutely perfect.
Chase: This part went without a hitch.
The Cave: The first and second screens go by without any problems. In fact, my second screen was exceptionally good because the enemies cooperated so well.
The only reason why I got hit so much near the end was bullshit bad luck. There is no invincibility window after recovering from an attack (even if you're knocked down), which means crap like this is possible. :'(
Cyclops's Lair: I exit then re-enter the stage because +4 strength makes a big difference at low levels, especially when you're fighting heavy enemies. My luck was quite good here. The coneheads didn't throw many bombs at me, and I usually managed to group at least two per screen.
Cyclops: Quite a good battle, I just should have been more aware of where I was when I killed the Cyclops.
Volcano: Pretty good, the only mistake that really stands out is needing to return to the bottom to kill that demon.
My fight against the skeletons sums up my stance on fair fighting better than words ever could.
Dragon: Perfect. I wait for the boulder because I die instantly if it lands on me. Boulders don't knock you down if you're big, they just hit you until you die.
Industrial Castle: Aside from the last screen, this was nearly flawless. I was especially lucky that a single bomb didn't hit me.
Boss: Okay, let me explain something, I've never killed the the gun on the right so quickly, I usually manage to kill it right as it appears a second time. Since I killed the gun so quickly, the hand came out early, usually the hand comes out right as the bottom-right pillar pops up, which works in my favor because I can just jump and spam X while hittting the pillar and the hand (if it comes near). Despite the hand flinging me about a bit, this is probably one of my fastest battles ever against this boss because of how quickly I killed the gun.
Sorry about the premature pause, I get a little impatient.
Pirate ship: NINJAS! Don't ask me why I hit that one ninja on the ground, I'm just stupid.
Desert: Skip the first minute or so, please. No, really, it's awful.
My defense is that Sandworms suck. Okay, that's a lame excuse. What isn't a lame excuse is that same sandworm that raped me can sometimes spawn WITHOUT A HITBOX AND BE COMPLETELY INVINCIBLE.
Now that you're past the biggest blunder ever, the rest of this stage was actually pretty good. The other sand worms were cooperative, and none of the other battles had any major errors.
UFO: I guess Behemoth is apologizing for Alien Hominid and granting players a quick therapy session over because these aliens go down in one hit. You can actually see the bullets, and now the enemies are the guys who die in one hit.
Honestly, this area went really smoothly. I had a bit of bad luck at the end with the aliens, but fortunately, I didn't end up getting hit by any of the steam vents (which can easily screw up a run).
Desert revisted: How I handled that last guy in the second screen is why you shouldn't assume the last hit you land will kill an enemy.
Desert Castle and Outer Court: I have no idea how my jumping attack completely whiffed on the masked big guy. I thought Behemoth learned their lessons in collision detection after Alien Hominid. ;P
I somehow received unbelievably bad luck with tornadoes (they usually don't occur unless if you knock down the enemies), but I think handled the area okay despite my luck. If you're wondering why I'm constantly worrying about what the Royal Guards do in the last screen, it's because they spam their arrow spell every chance they get.
My Beach Volley ball game was nice and quick though.
Graveyard: And now you get to see why upping vitality next is super important. A skeleton hits me once for half my life.
My skeleton battle in the beginning of the second area could have been better, but it's important not to get cornered, as you're pretty much dead if that happens. I only have one potion left at this point, and I usually need one for the boss.
That bag of gold was honestly some of the worst luck I could get. I didn't even know goblins appeared in this stage because you almost never see bags of gold.
Corn Boss: This battle might look shitty, but there's no way to get around the boss covering itself and knocking you down. This is actually a ridiculously lucky battle because I almost never get hit by any of his snapping attacks. This is definitely one of my fastest battles, if not the fastest I've had against this boss.
Medusa's Lair: No problems here. I guess the spawn on the last screen was pretty unlucky, but what can you do?
Medusa: This battle was nearly perfect. You could probably take off two-three seconds at most (and that's assuming you get perfect luck with XYY every time).
Full Moon: For a place that can rape you horribly if you just flinch the wrong way, this was an amazing run. Yes, this was another case of great luck.
Yes, I make a mistake or two, but my luck with grouping the enemies was so good the mistakes don't even matter.
Snow Field: Aside from getting hit a little more than I would like, this was a great run. Lots of big groups getting smacked around. :)
Ice Castle: I get past the Ice Wizard's obstacles without a hitch. I also manage to group the Eskimos together and beat them up quickly, which is great because it's easy get screwed by the ice physics.
My boss battle was quite good. I won't claim it as the best boss fight ever, but the boss used the slow charge up attack a couple of times, and I only missed one of my dash attacks because the boss spawned at a bad angle.
Final Stage: Maybe those wizards are immune to spells, but they aren't immune to beatdowns.
Painter: I had bad luck when he was walking around. The battle was pretty decent otherwise.
Cyclops: I screwed up a bit when he was hopping around (I should have led the undead groom closer to the coffin), but aside from that, this battle was great.
Necromancer: BEST LUCK EVER. wahwah I got hit, nope, doesn't matter, BEST LUCK EVER.
Final Battle:
Crystals: I probably lose a second here just from my own stupidity.
Second form: Arrrrrgh, I wish there was a consistent method of doing the glitch hit on this form. I was so close to killing the guy in one pass. If I didn't brain fart at the end and jumped up and mashed X, I probably could have killed this form in one pass.
Balloon 1: Perfect.
Spider Form: Yes, I miss a couple of hits here, but that was done on purpose because it's imperative to keep yourself in the spider's abdomen. If you slip below, you lose so much time you might as well restart the run.
Balloon 2: Kind of shitty, but I only lost a couple of seconds.
Final form: Fastest I've ever done it.
Ending: I fool around a bit during the end just so you can see all of the activity that's going on in the party. I love the little details everywhere.
The emotional gravitas of the true ending is easily greater than any Final Fantasy game.
I won't ruin the ending for you, but I will say this:
Only two things have made me laugh consistently in video games.
P.S. My audio commentary actually talks about the game this time. Don't worry, there's still some singing. =)